
HubSpot is a powerful CRM platform that allows businesses to attract, engage, and delight customers. However, the setup process can be daunting, especially for those who are new to the platform.
With a well-planned setup process, you can ensure a smooth transition and optimize your marketing activities.
In this blog post, we'll guide you through the technical and non-technical steps to set up your HubSpot account, from creating custom properties to connecting social accounts to migrating your blog, and more.
Doesn’t matter if you are just beginning to use a CRM platform or trying to migrate from your current marketing automation software to HubSpot, these steps act as an all-in-one HubSpot setup checklist.
Let’s dive right in!
13-step Setup Process Designed For Success
Setting up your HubSpot Instance
The first step is to set up your HubSpot instance. This involves reviewing data points and field types of available data, creating custom properties, and property categorization. To get started, follow these steps:
- Review available data: Review the data points available in your HubSpot account and determine which fields (like name, contact number, email id, etc.) you want to use.
- Create custom properties: Create custom properties for any fields not available in HubSpot by default.
- Categorize properties: Categorize your properties to ensure that they're organized and easy to find.
Importing Existing Records
Once you've set up your instance, you'll want to import your existing records. This involves de-duplication, merging, importing data to HubSpot, and mapping with custom properties. Here's how:
- De-duplicate your data: Before importing your data, de-duplicate it to ensure that you don't create any duplicates in your HubSpot account.
- Merge any duplicates: If you do have duplicates, merge them to create a single record.
- Import your data: Import your data to HubSpot using the Import tool. You can import all information about the companies that you have been interacting with or the sales deals that you are currently working on.
- Map your custom properties: Map your custom properties to the appropriate fields in HubSpot.
Setting up Brand-Specific Marketing Assets
To ensure a consistent brand experience for your customers, it's important to set up your brand-specific marketing assets. This includes brand guidelines setup, email domain settings and validation, and email footer and default brand marketing settings. Here's how:
- Set up your brand guidelines: Set up your brand guidelines in HubSpot to ensure that your marketing assets are consistent with your brand.
- Validate your email domain: Validate your email domain to ensure that your emails don't get marked as spam.
- Set up your email footer and default brand marketing settings: Set up your email footer and default brand marketing settings to ensure that your emails are consistent with your brand. The email footer must include your company name, business mailing address, and a link that lets your contacts manage their mailing preferences. Doing this ensures your emails comply with the CAN-SPAM Act of 2003. Also, read how to set up your CAN-SPAM email footer information.
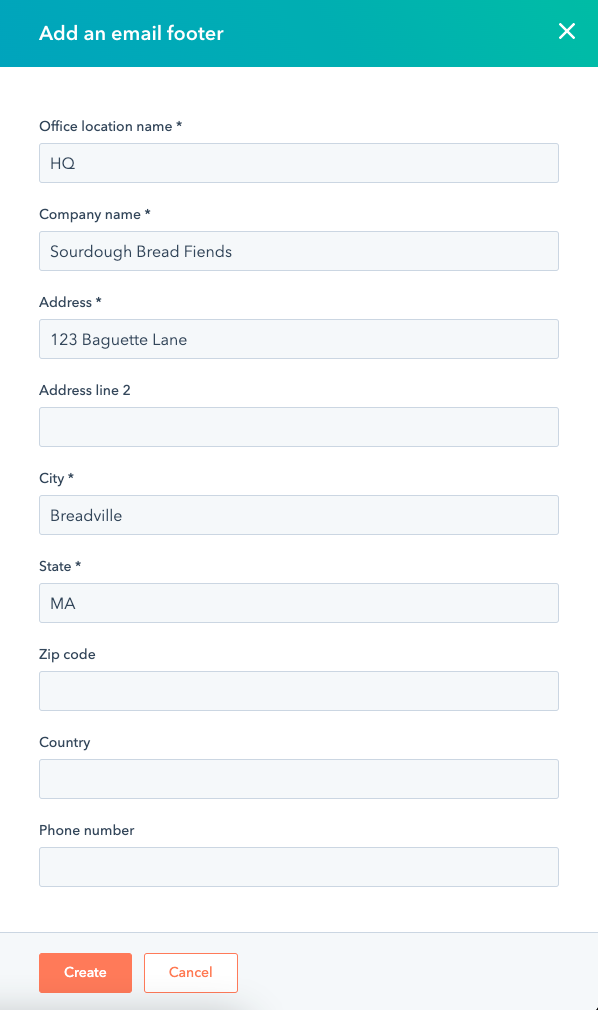
Source: HubSpot
Setting up Basic Analytics
HubSpot provides powerful analytics capabilities that allow you to track the performance of your marketing efforts. To get started, set up HubSpot Analytics on your website and other tools, and ensure that your tracking is validated. Here's how:
- Set up HubSpot Analytics: Configure HubSpot Analytics on your website and other tools to track your marketing performance.
- Validate your tracking: Validate your tracking to ensure that you're accurately tracking your marketing efforts. To do that, install a HubSpot tracking code which is a unique code for each account. This enables HubSpot to track your website traffic.
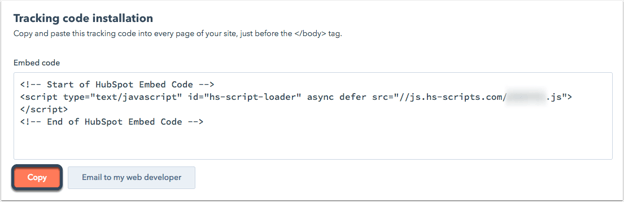
Source: HubSpot
Follow these steps to set up site tracking in HubSpot. This process will also help you filter out bot traffic and update settings for cookie tracking.
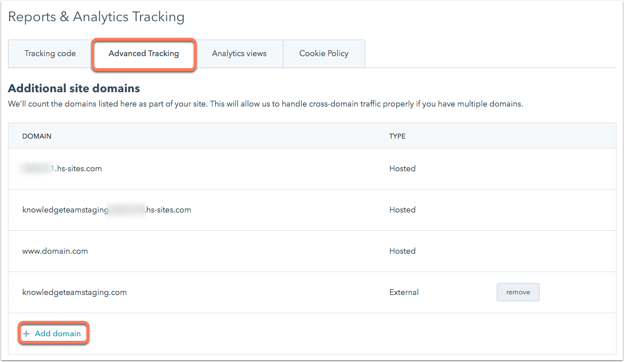
Source: HubSpot
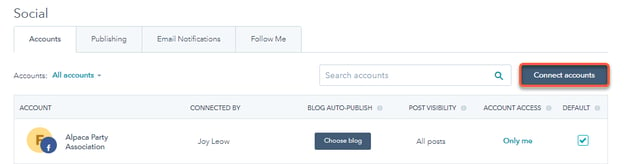
Connecting Social Accounts
This is another key HubSpot setup step. HubSpot allows you to connect your social media accounts to your HubSpot account, enabling you to schedule and publish social media posts from within HubSpot. Here's how:
- Connect your social media accounts: Connect your social media accounts to HubSpot to enable social media publishing. You can connect your account to the following social media platforms: Facebook, Instagram, LinkedIn, Twitter, and Youtube (only with the Marketing Hub Enterprise HubSpot plan).
Source: HubSpot
Here are the steps to connect your social media accounts to HubSpot.
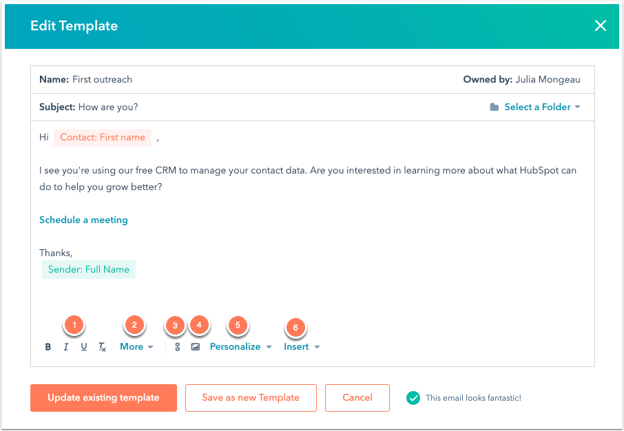
Setting up Emails
Email marketing is a critical component of any marketing strategy, and HubSpot provides powerful email marketing capabilities. To get started, add your sender details and create email templates. Here's how:
- Add your sender details: Add your sender details to ensure that your emails are delivered to your recipients' inboxes.
- Create email templates: Create email templates for your promotion, nurture sequences, and newsletter campaigns. Here are the steps to create email templates and send sales emails from HubSpot. Also, read how to create and edit nurture sequences.
Source: HubSpot
A lead scoring model
The lead scoring model allows you to assign scores to your leads based on the contact or company properties. This will enable you to identify and prioritize the most promising leads and focus your marketing efforts on converting them into customers.
To set up a lead scoring model, start by assigning scores to your contact and company properties. Then, create a list of actions that indicate a lead is moving closer to becoming a customer. Assign scores to each action, and set up a system that automatically adjusts a lead's score as they take these actions. Here are the steps to set up a lead scoring model in HubSpot:
- Click on the "Contacts" dropdown menu on the top navigation bar and select "Lead Scoring."
- Click "Create Score Properties" and choose the properties you want to use to score your leads.
- Once you've selected your properties, assign a point value to each one.
- Next, create a new lead scoring model by clicking on "Create New Model" and giving it a name.
- Assign point values to the properties in your new model and save your changes.
Lead routing workflows
Lead routing workflows are another important aspect of HubSpot's lead management capabilities. These workflows will ensure that your leads are assigned to the appropriate sales representatives, based on criteria such as location, industry, or size of the company.
To set up lead routing workflows, start by creating a list of criteria that should be used to assign leads to sales representatives. Then, create a series of workflows that will automatically assign leads to the appropriate sales representative, based on these criteria. Here are the steps to set up lead routing workflows in HubSpot:
- Click on the "Automation" dropdown menu on the top navigation bar and select "Workflows."
- Click on the "Create workflow" option and select "Contact-based" or "Company-based" on the screen that comes up.
- Choose the starting condition for the workflow, such as "Contact enters a list" or "Contact fills out a form."
- Define the actions you want the workflow to take, such as assigning a lead to a specific user or adding the contact to a specific list.
- Save and activate your workflow.
Other workflows
HubSpot offers a variety of other workflows that can help you to automate your marketing processes. These workflows can be triggered by custom events, such as a lead filling out a form or clicking on a link.
To set up other workflows, start by identifying the events that should trigger the workflow. Then, create a series of steps that will be executed when the event occurs. This might include sending a follow-up email, updating a contact record, or creating a task for a team member. Here are the steps to set up workflows in HubSpot:
- Click on the "Automation" dropdown menu on the top navigation bar and select "Workflows."
- Click on the "Create workflow" option and select "Contact-based" or "Company-based" on the screen that comes up next.
- Choose the starting condition for the workflow, such as "Contact enters a list" or "Contact fills out a form."
- Define the actions you want the workflow to take, such as sending an email or changing a lead score.
- Add any additional criteria or filters to ensure the workflow runs only for specific contacts.
- Save and activate your workflow.
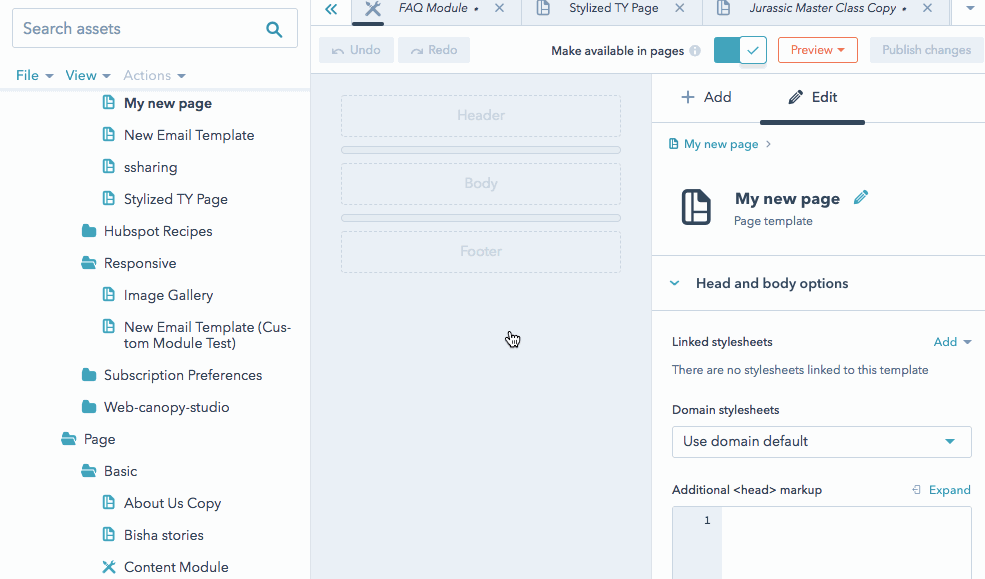
Initial Landing Pages and Email Templates
Landing pages and email templates are essential to any inbound marketing strategy. Here's how to create them in HubSpot:
- Click on the "Marketing" dropdown menu on the top navigation bar and select "Website."
- Click "Landing Pages" or "Email" to create a new template.
- Choose a template or create one from scratch using the drag-and-drop editor.
- Customize your template with your branding, messaging, and images.
- Save and publish your template.
You can also create thank you page templates using the same steps above. Read more about the steps here.
Source: HubSpot
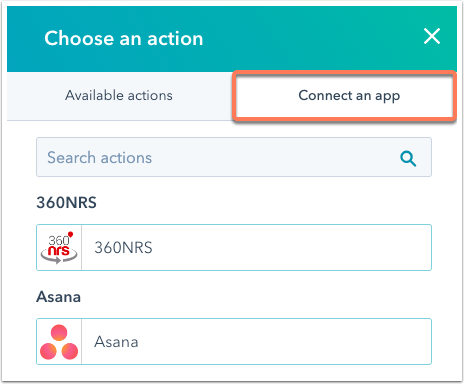
Integrations
Integrating third-party Martech tools with HubSpot can help you streamline your marketing activities and improve your workflows. This will enable you to sync your data across all your platforms, making it easier to manage your marketing campaigns. Here are the steps to set up integrations in HubSpot:
- Navigate to the "Integrations" tab in the settings menu. Here, you will find a list of all the tools that can be integrated with HubSpot. Select the tool you want to integrate and follow the steps to connect it with HubSpot.
Know more about how to connect apps to HubSpot.
Source: HubSpot
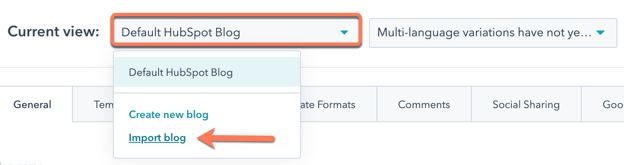
Blog Migration
Migrating your existing blog into HubSpot is an important step in ensuring that your content is optimized for inbound marketing. This will allow you to manage your blog within the HubSpot platform, and use the built-in analytics tools to track your content's performance.
To migrate your existing blog, create a blog template within the HubSpot platform that matches the design of your current blog. Then, import your existing blog content into HubSpot, making sure to map the appropriate fields. This will ensure that your blog content is properly formatted within HubSpot.
 Source: HubSpot
Know more about importing your blog from any CMS.
Training
HubSpot setup isn’t complete without training. Once you have integrated your other tools and migrated your blog into HubSpot, it is important to train your team on how to use the platform effectively. This will help you to get the most out of HubSpot's features and capabilities.
HubSpot offers a variety of training options, including online courses, webinars, and in-person training sessions. You can also use the HubSpot Academy to access a wide range of educational resources, including certification courses, tutorials, and best practices. You can begin training yourself here.
Conclusion
By following these 13 steps, you'll be well on your way to answering how to set up HubSpot for success. With the right approach and a bit of patience, you'll be able to leverage the power of HubSpot to grow your business.
If you aren’t confident about doing the HubSpot setup yourself or don’t have the bandwidth, a HubSpot partner can assist you with that.
Read more about how you can choose the right HubSpot experts to get it implemented right.
We, at fractional CMO, are Gold-certified HubSpot partners and can help set up your HubSpot instance effectively.
We have vast experience helping businesses offload their HubSpot setup task from their shoulders onto ours and witness a flawless setup.
Here’s one case study showcasing how we achieved that for one of our clients.

Feeling confident in us and want to know more? Contact us today and we will walk you through our process in detail.