
Have you built your website from scratch, putting all your time into making it just perfect? Wait a minute, let us tell you, it is just the tip of the iceberg in your journey towards searchability and being visible online.
In part-1 of this blog we discussed the meaning of Google Search Console, how to use google search console, and the beginning steps of setting up your website and its verification.
Let us dive even deeper to understand further on setting up your website on the google search console for wide visibility!
Setting up Google Search Console for your website - PART 2
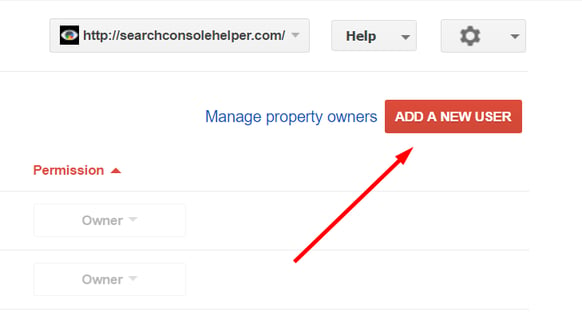
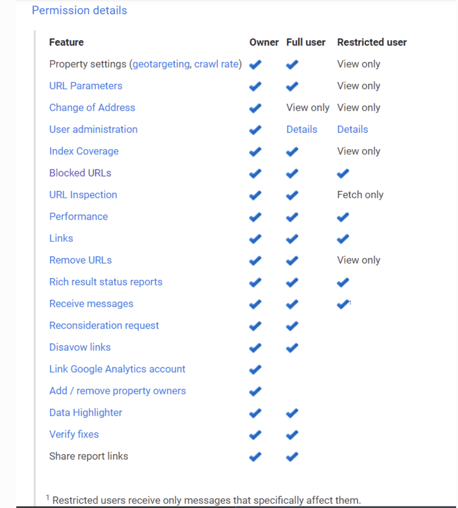
Adding owners, users, and permissions
When speaking of the roles, these are of two types. One is the owner, who is a verified entity and has complete control over the properties they own on Google Search Console. They can access all the tools, edit the settings, add or remove users, and view all the data. Then there is a delegated owner also, appointed by the verified owner, and these delegated owners hold the power to add more delegated owners.
The other type is the user. The full user can perform some actions and view all the data, on the other hand, the restricted user can only view the data.
 Source: Search console helper
 Source: SearchConsoleHelper
Now, coming to adding permissions to these entities. You need to give serious consideration to the permissions that you want to give to your employees, based on their roles and responsibilities.
Based on that, see which employee can be given delegated owner permission, which one to give full user permission, and so on. Giving access to each and every one of your employees can be catastrophic, as it might lead to accidental loss of data.
Source: Feed the curiosity
Setting up the XML Sitemap
This step begins by understanding whether you truly need an XML sitemap for your website or not. If your website has pages that are properly linked to each other, Google’s web crawlers are easily able to find the pages of your website.
If you insist on setting up an XML sitemap for your website, you must do it only if it enhances the crawlability of your site, and that would happen if:
- Your site is very big in terms of the number of pages, which increases the chances of any page being missed out by Google
- Your site includes isolated pages, which are those having few inbound links, making it tough for Google to crawl and detect
- Your site is relatively new and has lesser backlinks, making it tough to be located
- Your site utilizes rich media content
Source: Zendesk
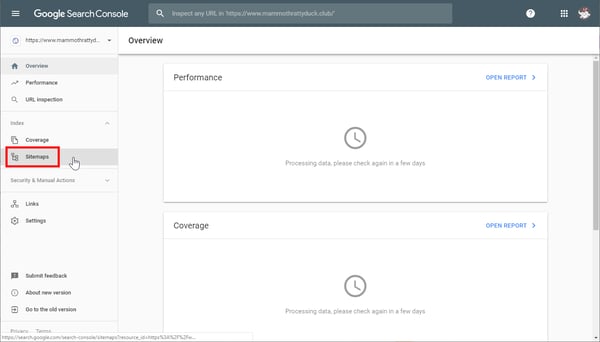
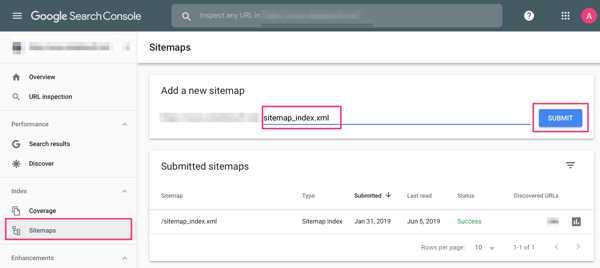
After successfully building a sitemap, ensure submitting it via the GSC sitemaps tool. Once Google has finished processing and indexing your sitemap, it will be visible in the Site maps report. This would display the time when Google last viewed your XML sitemap and the number of URLs that it indexed.
Source: Reliable Soft
Now that we have had a look at how to set up Google Search Console, let’s have a brief look at how to use Google Search Console.
How to use Google Search Console- A Brief Introduction
Filters in Google Search Console
Google webmaster tools offer you the ability to render and view your data through different filters readily available. But owing to the fact that you are just beginning to understand Google Search Console, they can really make you feel baffled.
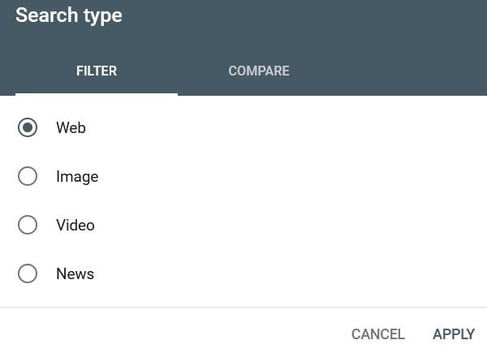
There are 3 different filter types:
Filter by search type
Web, video, image, and news are the 4 search types, and you can choose from them based on the fact that from which search type your website gets the most traffic. If your website gets the maximum traction from web search, choose web as the filter type, and so on.
 Source: Search engine journal
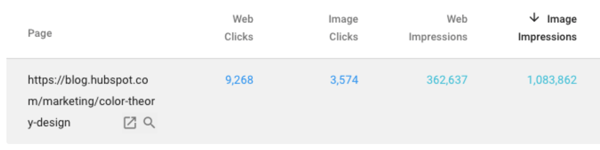
Another interesting option available for you to utilize is the “Compare” tab. It helps you to compare the 2 sources of traffic. After clicking on the “Compare” tab, select the traffic sources of your interest and click on “Apply”.
This can unravel some pretty interesting discoveries. For instance, you can get to know that your website is getting more impressions from image search, as compared to a web search.
 Source: HubSpot
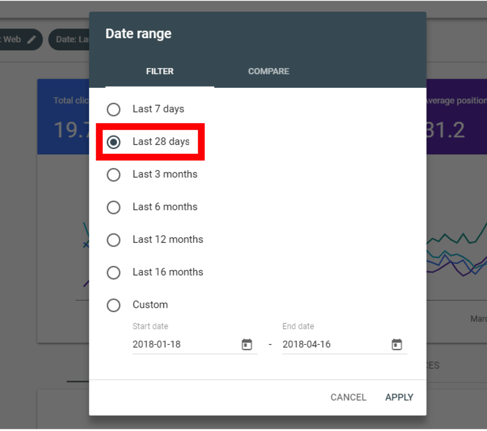
Filter by date range
Google Search Console provides 16 months of data now, from the previous 90 days limit. There is a wide range of pre-set time periods for you to choose from, or you can also go for a custom range setting.
Source: Backlinko
By clicking on the “Compare” option, a comparison of 2 date ranges can also be achieved.
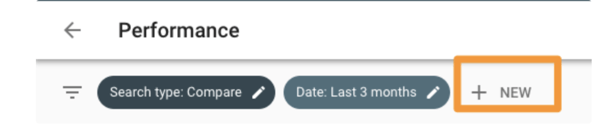
Filter by Queries, devices, page, search appearance, and country
There is an option named “New” just alongside the “Date” Filter, from where you can add more filters, such as Queries, device, page, search appearance, and country.
Source: HubSpot
You can play along with these filters, which can be layered one upon the other. For instance, if you want to see data for the queries related to SEO on mobile as a device, go on and add a filter for queries including “SEO”, particularly on mobile devices. For further filtering to view posts on a particular blog, adding a “Pages” filter with a particular URL of that blog would fetch the desired results.
Wrap Up
The best practices for being visible online and getting your website the traction you desire, are listed in the step-by-step introductory guide above. Paying due heed to each phase of setting up your website on Google Search Console will definitely answer your question- “how to use google search console”, and your journey to searchability will achieve new heights, in terms of your website getting noticed!